Embellished Citrus Garland

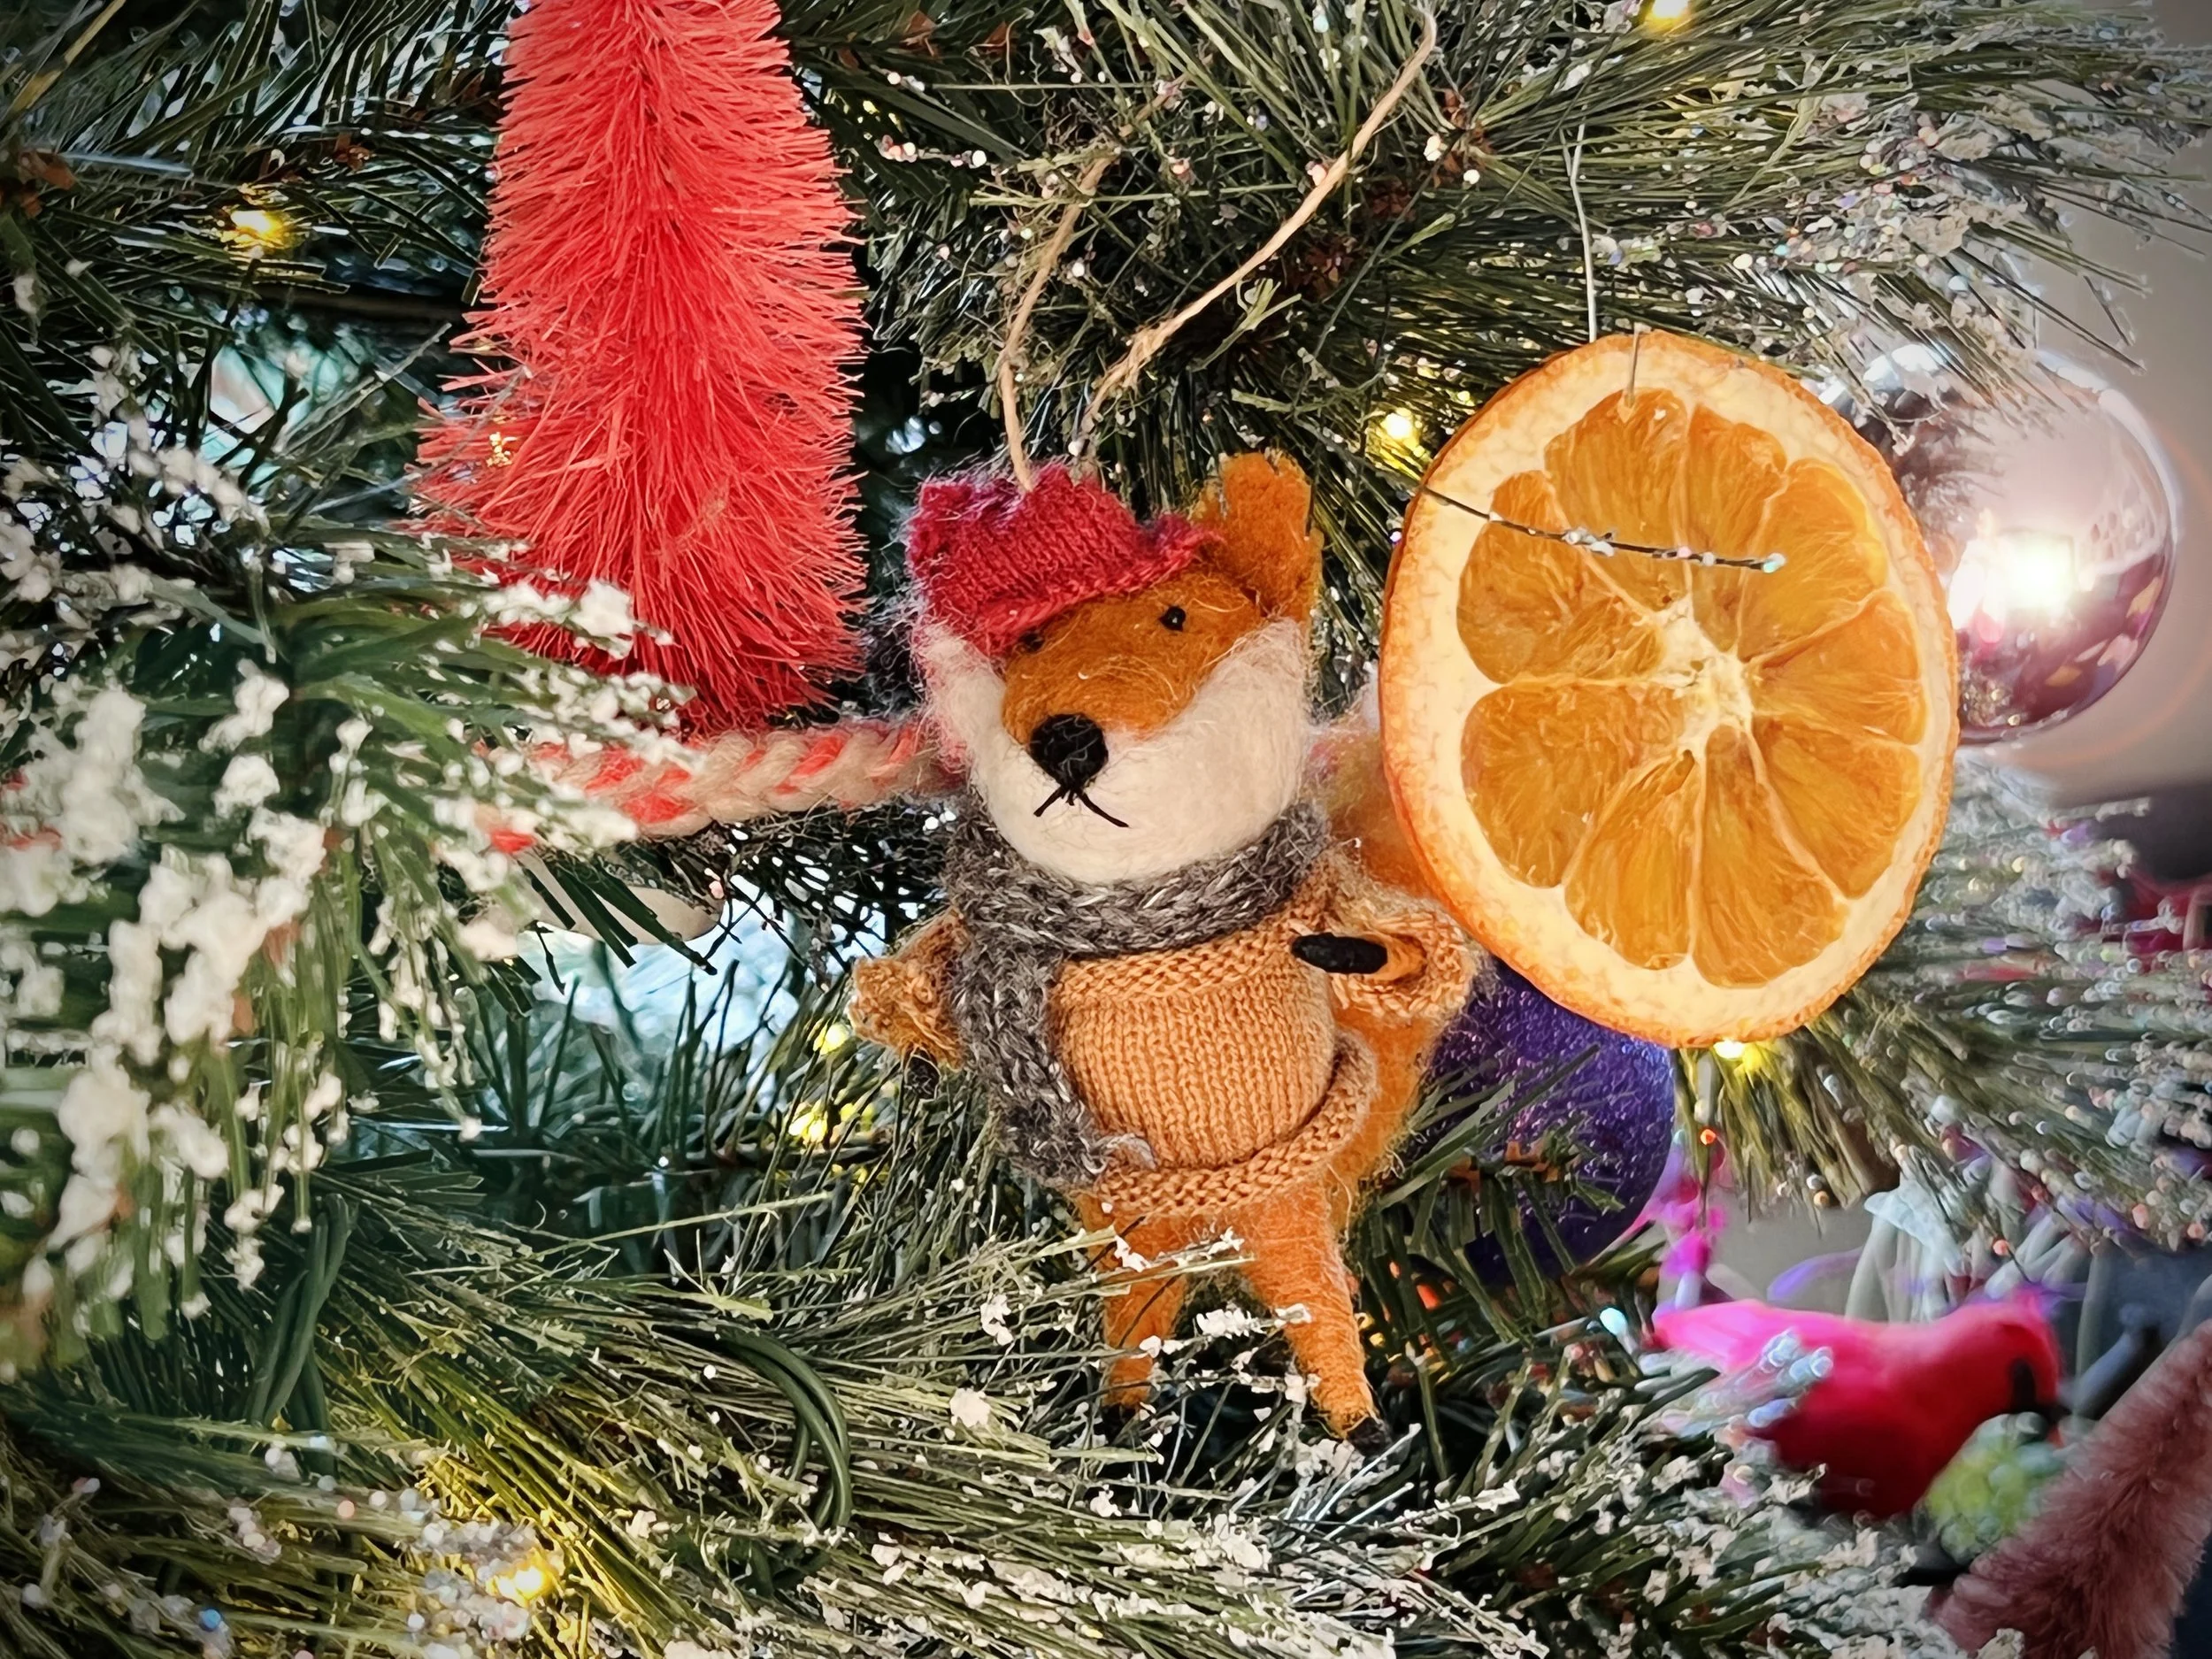
I have always loved the look of dried oranges during the holidays…but I’ve never taken the time to create anything with them! But this year…we did! We made a garland! Ok ok…we “embellished” a garland. But…it still made me just as happy!

There are lots of things you can do with dried oranges:

  • Decorate the tree

  • Attach them to gifts

  • Make yummy tea

  • Use in jams, jellies, and even soups

  • Grind them and add it to smoothies

  • Add to hot chocolate mulled cider

I cut a bunch of oranges and stuck them in our dehydrator at 135 degrees for…a long time. LOL!! No really, it did take quite a while to dry them out because I cut them pretty thick (1/4 - 1/2 inch). It took approximately 12 hours to get them completely dry. You can also dry them in a low heat oven (200 degrees for 3-4 hours), but they won’t retain their bright orange color quite the same as the dehydrator.

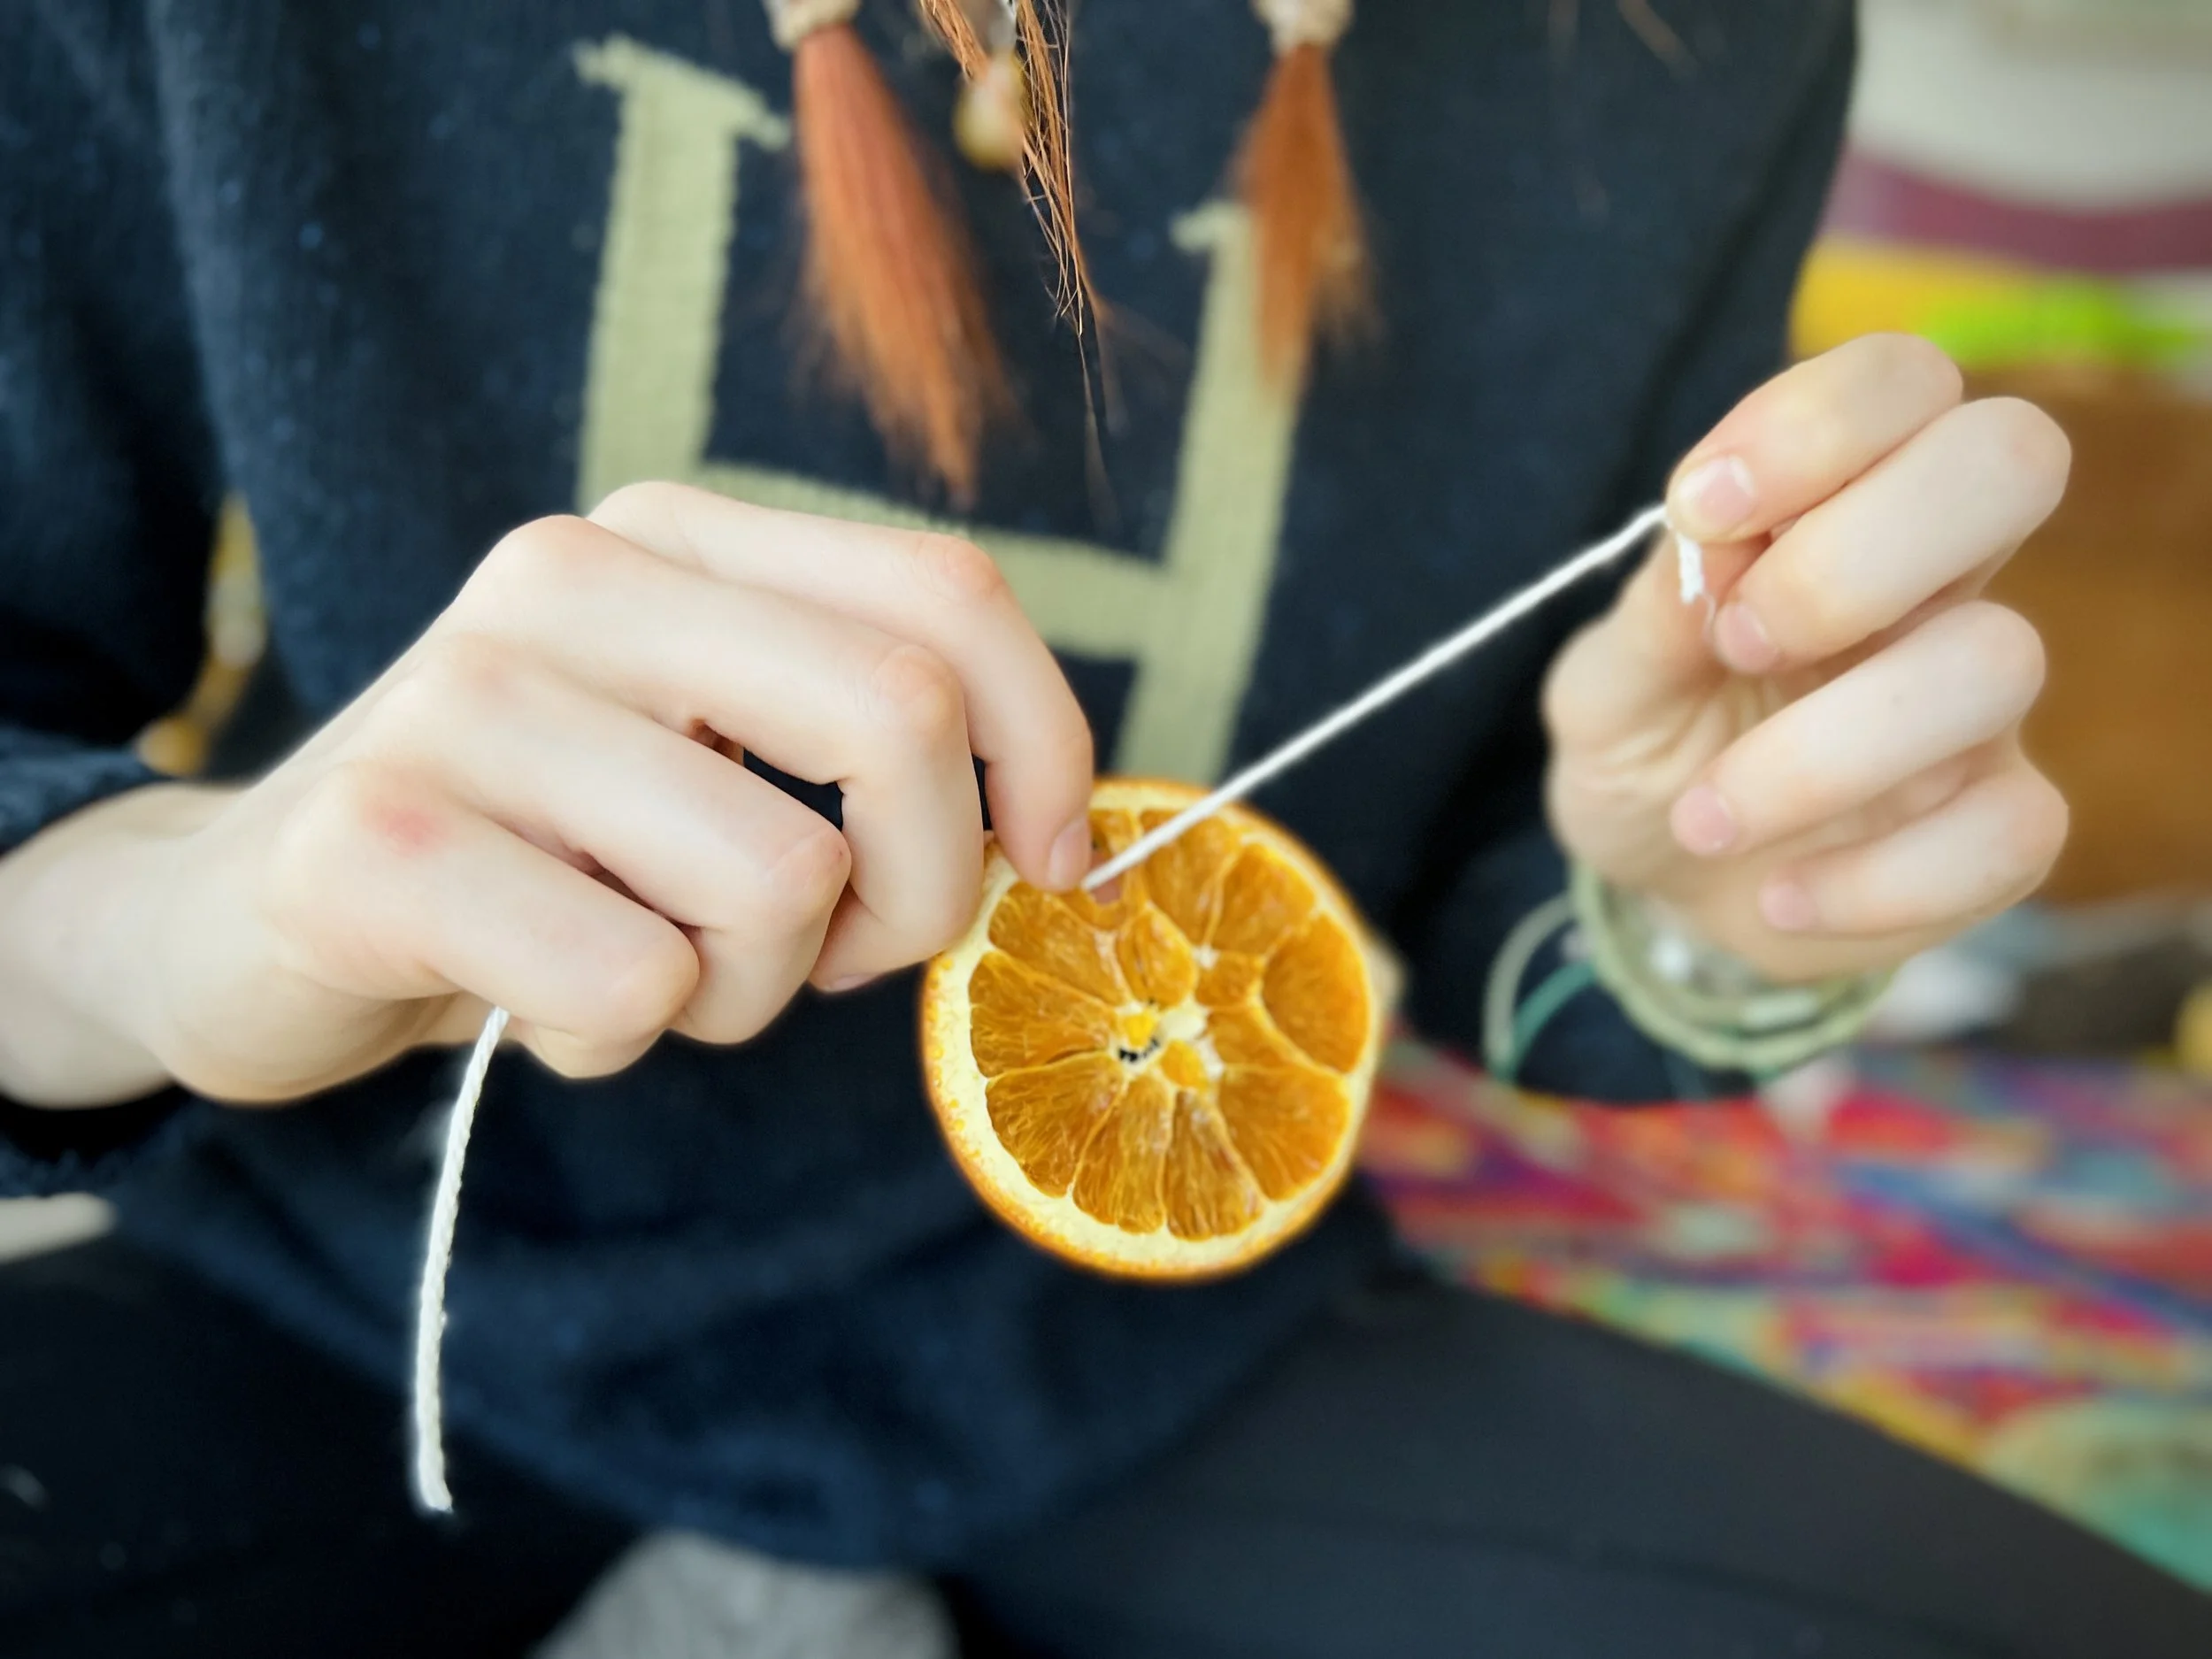
Grab some twine and string the oranges up…and then tie them to any garland! You can make one of your own from pine boughs, purchase a pre-made live garland, or just order this one on Amazon like I did! Easy. :)

You could also make an entire garland just of oranges!! Those look amazing with cranberries and popcorn and cinnamon sticks mixed in. The kids will love helping and you’ll love how it looks!

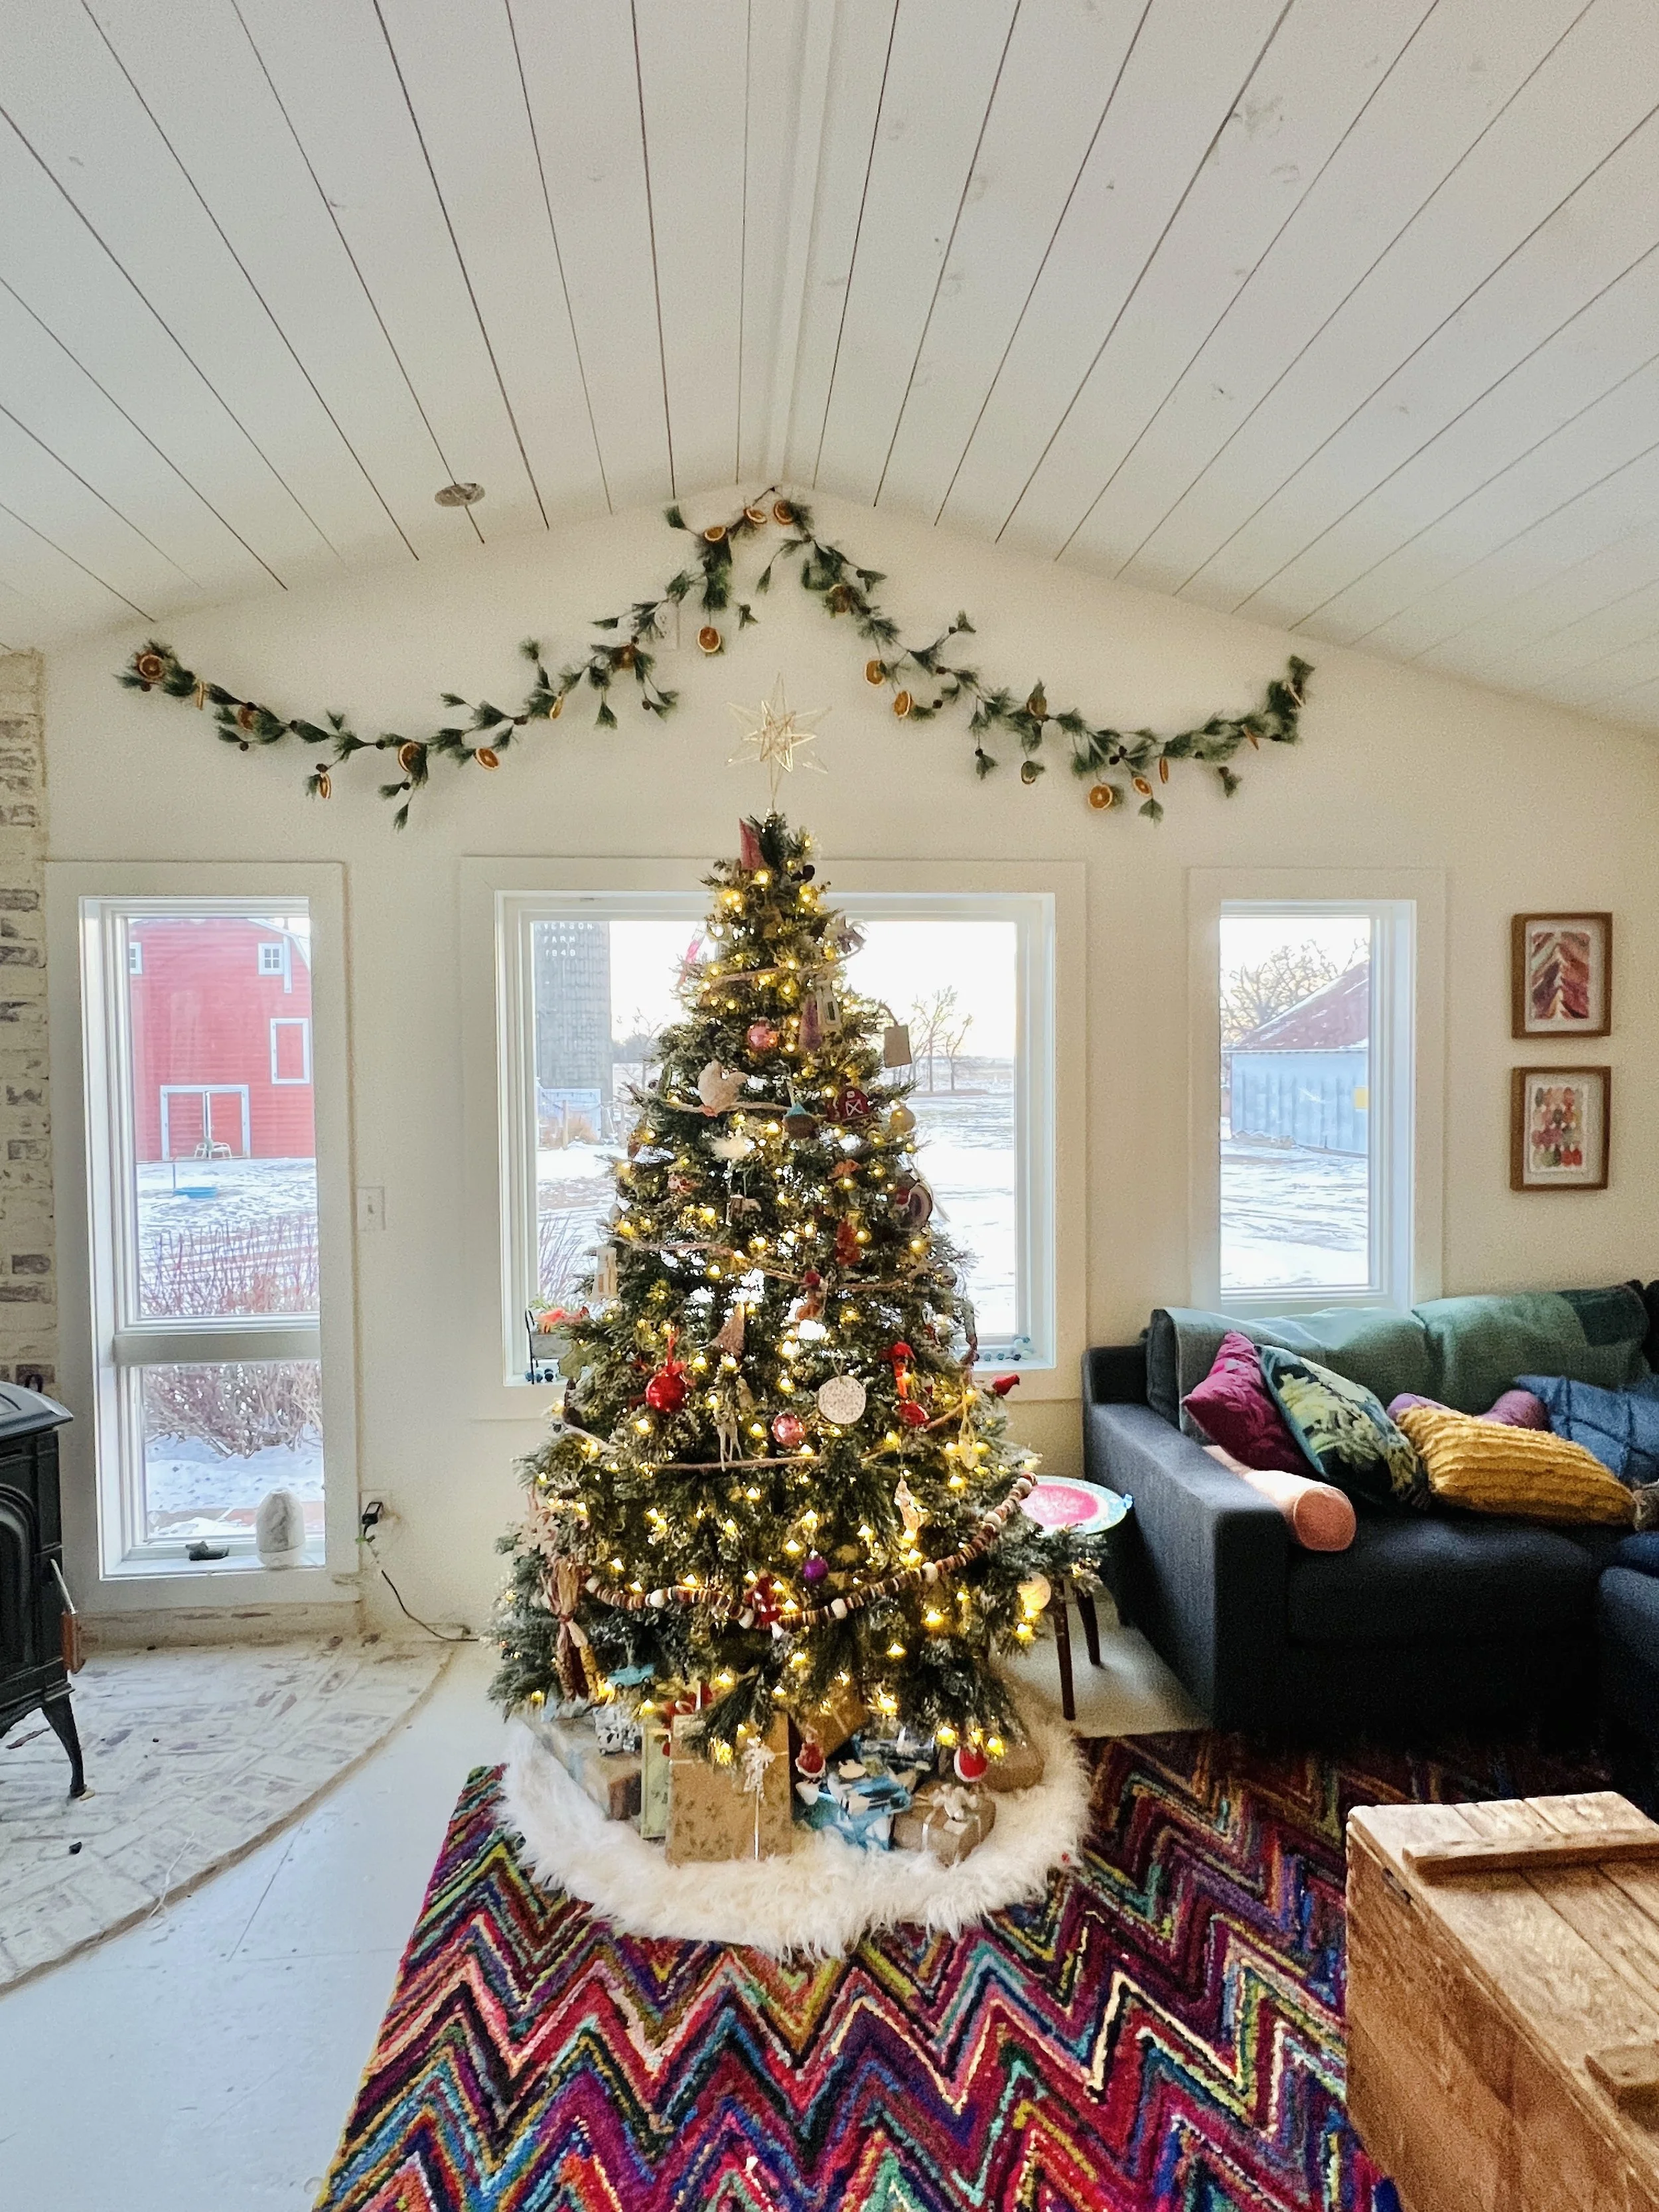
All done! Love how it turned out and how it draws your eyes up to the peak. Make something happy with oranges today!

Lots of Little Lovelies

image.jpg

We spent the weekend at home...doing some of my favorite things: cleaning, organizing, and adding bits of color and whimsy! Curtains were hung. Storage was added. I snagged a nearly new sheepskin rug on Craigslist. Totally obsessed with it. Unfortunately, so are the dogs. I have to put it up every night. A small sacrifice to enjoy the amazing squishiness. 

image.jpg

We trimmed out several windows with our salvaged barnwood. I love the mixture of bright white + bright colors...and a bit of rustic. Oh, and free is good.

image.jpg

We don't know exactly when we'll be putting in our tile backsplash, so instead of waiting, we hung all of our shelving/pots so that the kitchen is more functional in the meantime. 

image.jpg

The other set of open shelving was hung...which means now my jarred dry goods are on display. Food art!

image.jpg

More curtains...these were originally a huge soft tablecloth that I found for $2.00. I knew immediately that I would cut it in half and clip it up for curtains! No hemming or anything fancy. Just cut and clip! While I was taking this photo...a hummingbird who was wearing the exact colors of my curtains flew up to the window for a bit and stared at me. And then flew away. It took my breath away...pure magic. 

image.jpg

Oh what's that? You thought my wall was orange? Well it's not. LOL! For those of you counting, this is the fourth color that has been on this wall. Yellow, Green, Orange...and now WHITE! After the floors were finished, the color was just..."off". Matt and I were both on the same page this time...knowing that we had to change it. I ADORE the white. This week you will find me dreaming up a gallery wall for that space. Art, trinkets, and more! Eeeeeep! Oh, and I'll be on the hunt for the perfect light fixture. I think I may already have it in my shed...just needs a bit of paint.

image.jpg

Speaking of paint...there will be lots of spraying. Our dining table chairs are getting a facelift. 

...and then this. Oh my. I don't remember the last time I FINISHED an entire book. Front to back.  It's that good. For those of you who email and ask if I'm ever going to write a book about decorating...my answer can now be "NOPE! Just read The Nesting Place"! It's inspiring, accessible, quirky, funny...I want to buy a copy for everyone! You know that feeling when you get to the end of a book and you're sad because you want it to go on forever? Well, I feel like now it can....because she has a blog too! I'm pretty sure I'm way late to the party on discovering Myquillyn. But if she lived in Boulder, we would be BFF's. 

image.jpg

So there it is! Weekend goodness. We did take time to swing in the hammock (under newly hung happy flags!), meet neighbors, walk in the sunshine, and check out a new gathering in Boulder. Oh, and I almost forgot about the bear who came to visit!

And now it's Monday morning...oatmeal has been eaten. Coffee savored. Doors and windows are open with a cool breeze blowing through. Sunshine galore. It's completely quiet outside except for the birdies singing their hearts out.  

It's going to be a great week! Oooop, well, my kids are trying to poke each others eyes out. Gotta run! Still off to a great start! :)

*Not a sponsored post, but Amazon affiliate link on the book. When you use that link to buy anything on Amazon...I get a tiny little bit of the purchase at no cost to you. Thanks for supporting my blog! 

Transformed: Vintage Dresser to Kitchen Island

Here it is! Here it is! I'm so excited to share this with you...because it's been my favorite part of the kitchen remodeling process. We are in love with our cheery turquoise island and the dreamy yellow globe light. It instantly turned our kitchen into a more finished space, and we're thrilled at how it turned out. It's one more piece in the puzzle...many more things to finish in this space, but for now...we rest. And sit back in awe of this blue beauty. 

How sweet is the gold hardware and barnwood? My husband makes dreams come true!

So how did we do it? It all started one sunny afternoon when I walked into a local thrift store. I knew in an instant that this was IT. The one I had been searching for. And oh there was searching. Craigslisting. Antique shop browsing. We even considered just getting the stock IKEA island to match our cabinets. But there it was. Just sitting there. FOR THIRTY DOLLARS! The best part is that it's a 1960's vintage piece, just like our house :) Dovetailed corners and solid wood. I couldn't have asked for anything better in my dreams. It measured 72 inches long. Exactly the size we needed. *sigh* It was all coming together!

Next up was the paint color process. I was still feeling a bit traumatized by the white paint episode...and I was undecided on what color this most important piece should be. I considered green. And yellow. And then I realized that I LOVED this blue color on my vintage Pyrex bowl. I searched Pinterest for some examples, and found this. I totally fell in love and then set out to make it so. 

island paint.jpg

I took my bowl down to the Unfinished Furniture Store in Boulder and low and behold, there was a new color in the General Finishes paint that matched almost perfectly.

I knew it needed to be a bit lighter, so we cut the can of "Patina Green" (which is actually blue)...with a full can of "Snow White". Yes. It was good. So good. 

We needed to raise the island about 6 inches to match our countertop height. Matt had salvaged some legs off of a table that was in the trash and he cut them down and reattached them.

He created the top from pieces of wood that he screwed together and then painted it the same color as our cabinets and distressed it. Eventually, we would love to get a piece of white quartz to replace the top...but for now, it's working great!

He did 3 coats of paint and 2 coats of Vermont Naturals PolyWhey for furniture (the same company we used for our floor).  

And lastly...the hardware! I kept the original hardware because it was cute and I hate buying new when I can re-use the old! I tend to ALWAYS gravitate toward silver. But this time, my heart said GOLD GOLD! There are sooooo many different shades of gold spray paint...but grabbed the first one that looked right. Rustoleum Pure Gold. Perfect. 

And there you have it! For a total cost of $110 with the paint and poly. True love in the form of a kitchen island. 

If you love it...would you PIN IT? I would be forever grateful :-)
Have an amazing weekend!

*none of the products used were sponsored...we just love all of them and wanted to share!