How to Create a Boho Gallery Wall
/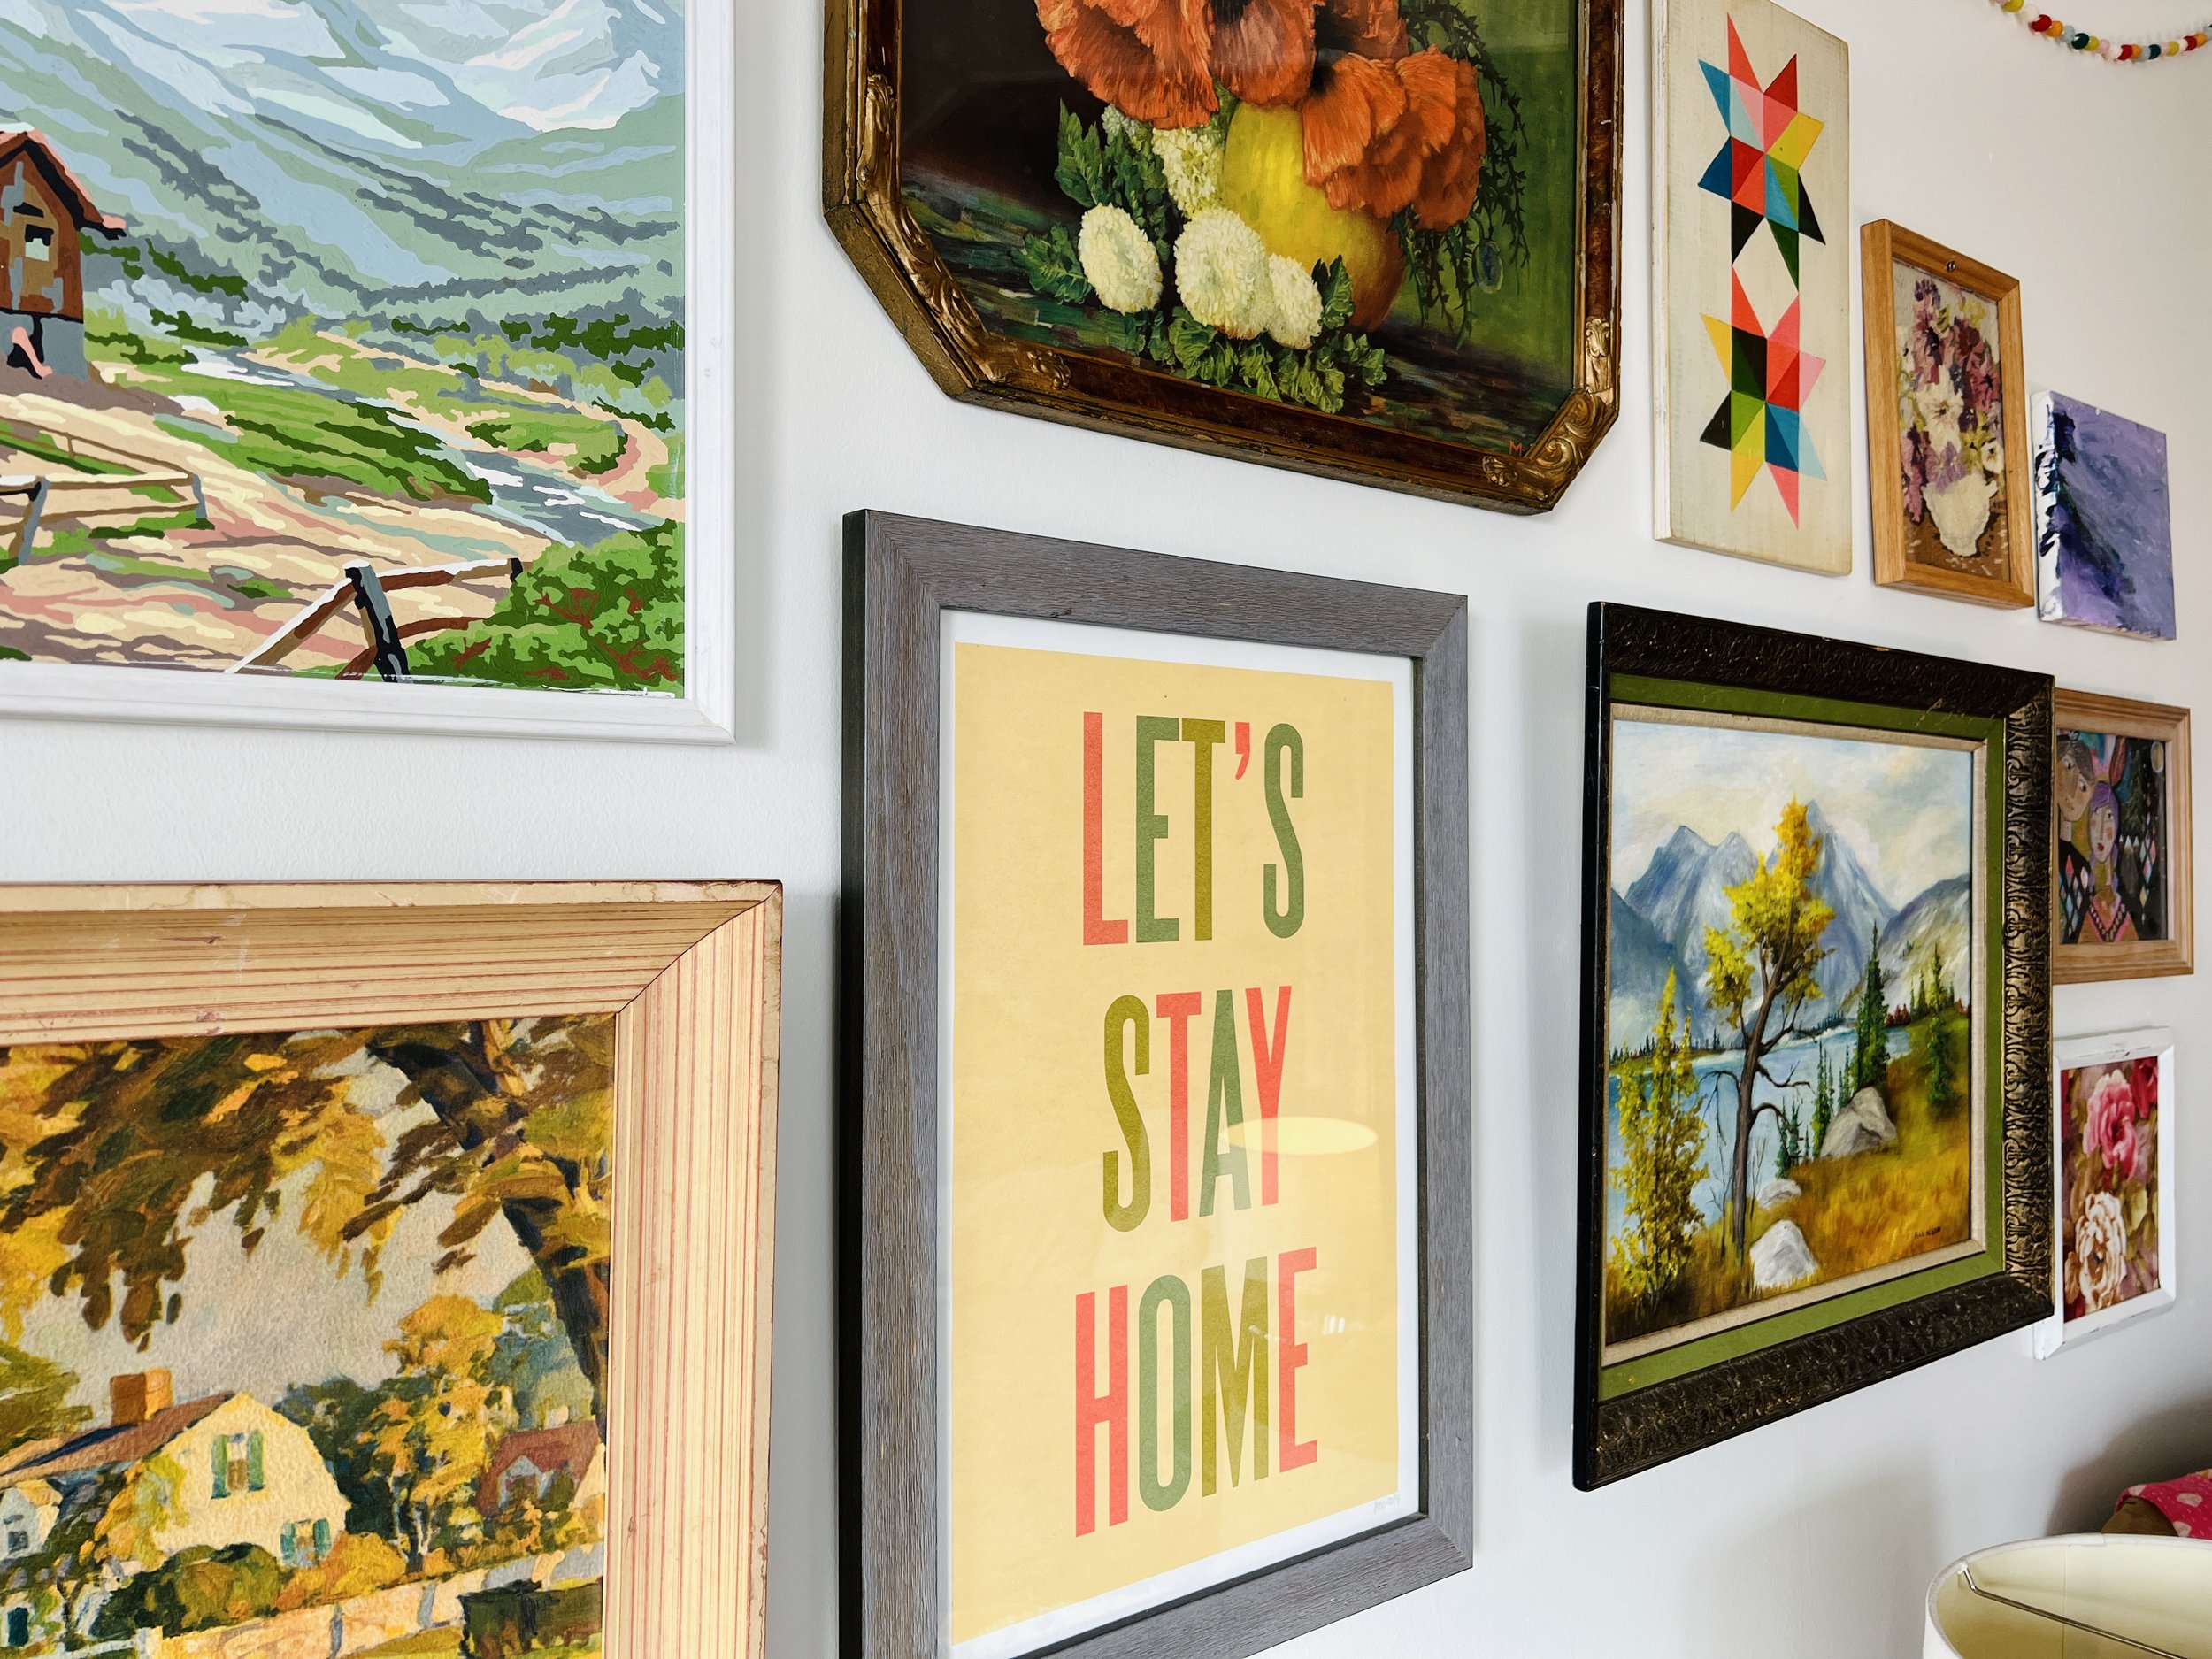
Gallery walls are my favorite. I LOVE collecting quirky, unique art from thrift stores and Etsy shops. I have art my kids have made, art my friends have painted, and art from my Nana’s hands. It makes me giddy to find an original painting at Goodwill…because someone took hours and hours to create magic on that canvas, and I get the opportunity to help it live on for longer! I have also found funky pieces at Home Goods, TJ Maxx, Target…whenever I see something and my heart skips a beat, I know it should be on the wall! Every item on our walls has a story…and memories attached. Putting up art makes me feel truly HOME.

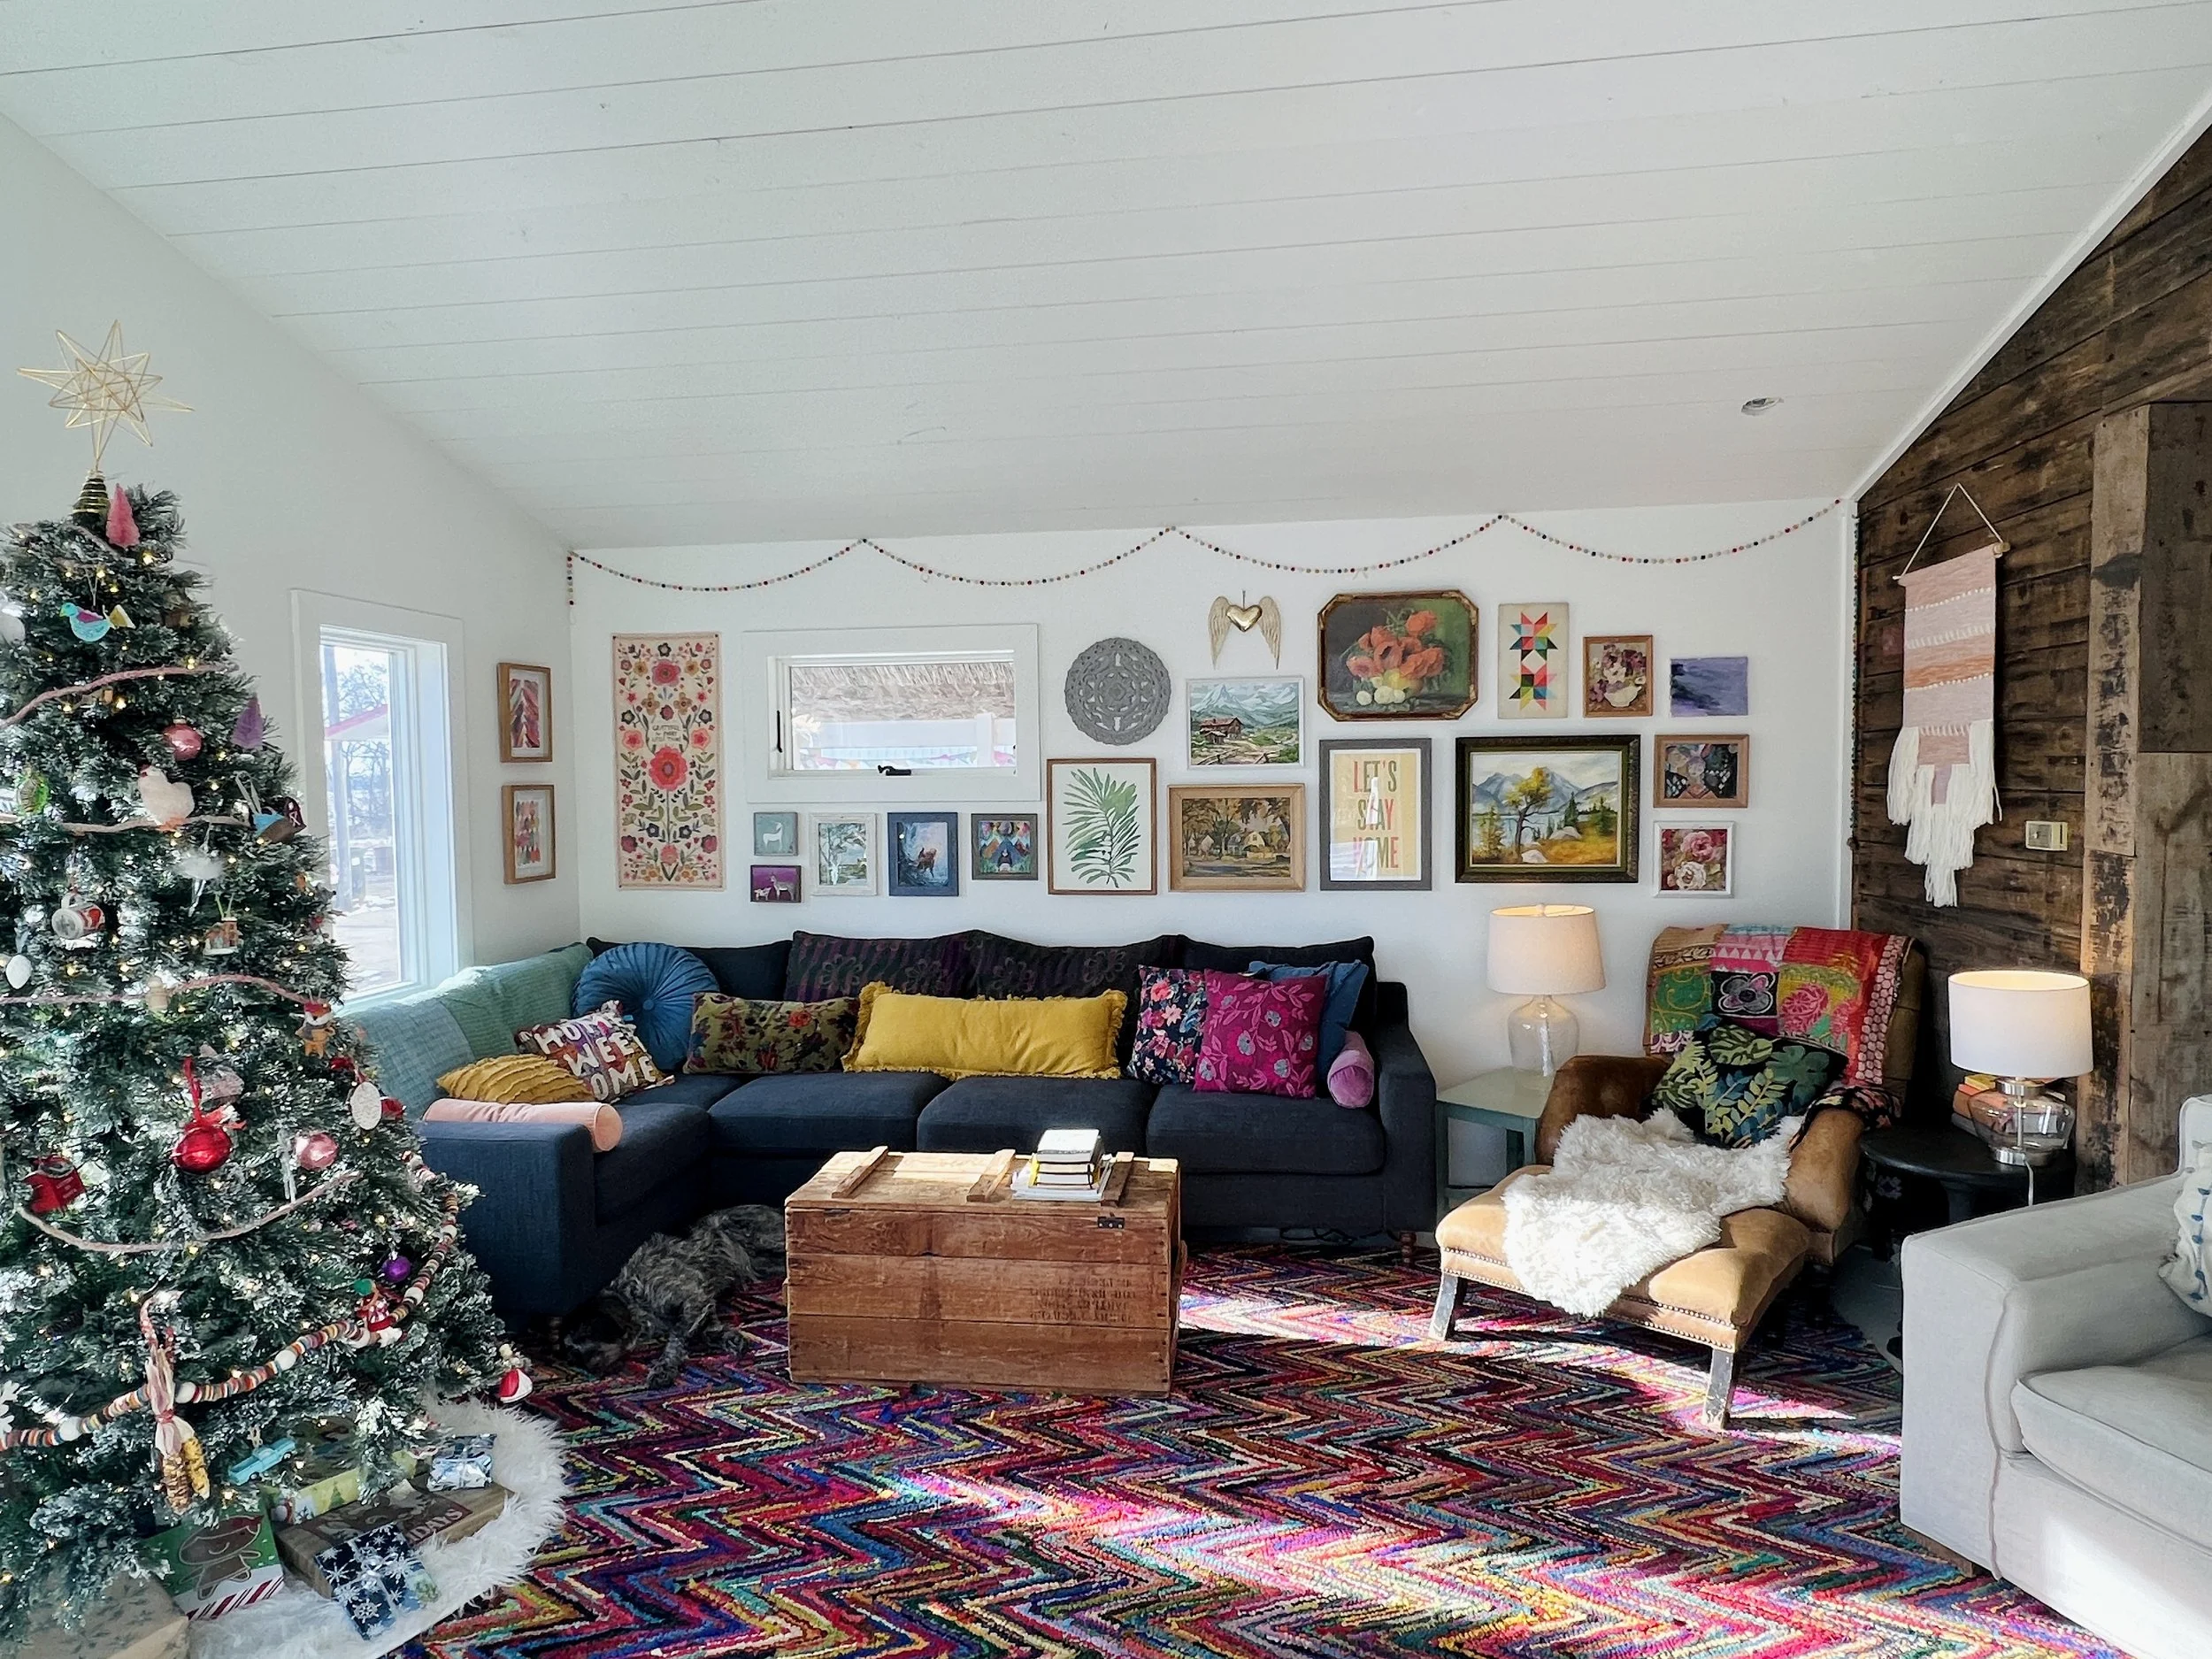
Isn’t it a crazy change?! The coziness level increases ten fold! We finished this room just a few days ago…and now we can’t stop hanging out in there! The wall makes it even more fun. And because I know someone will ask…I got the rug from RugsUSA (Multi Chevron), and all of the furniture was bought on marketplace. We love buying things second-hand! This couch was such a fun story…Matt found it on marketplace and it turns out the owner was a blog reader here years ago! We got to meet when we picked it up…it’s just such a small world! Hey Mara! Check out your couch! It’s definitely well-loved here!
Gallery Wall Tips:
Just begin. Stop thinking about it and do it! Pick up your biggest piece and start there.
Get the right tools. We only use screws…never nail & hammer (although you could). Many times, we will just screw right through the frame to secure it. That was a trick we started using when we hung art in our RVs. Use double stick tape to secure unruly pieces that want to sway every time someone walks in the room.
Give yourself enough time so that you’re not rushing. It took us about 90 minutes to do the upstairs and 45 min to do the basement. But we are experienced professionals LOL…so plan for longer if you’re new to this! There is, however, a benefit to setting a timer/goal so that you don’t get hung up on every little detail.
Lay everything out on the floor. Have someone hold it up and look at it from far away (you’ll notice a lot of this in the video!). Don’t forget to mix and match horizontal with vertical. I know some people say to cut out the shapes of each frame from newsprint and hang them on the wall first. In all my years of making these, I’ve never done that. But if you tend to lean to the crazy perfectionist side, you might consider doing that.
Have a helper. But not 2 helpers. More people = more opinions. And more opinions will only slow you down!
Be methodical and keep moving forward. Matt and have I this down to a science. I place it and hold my finger on the wall where he needs to place the screw, and bam. Done. Repeat that 32 more times and we’re done.
Keep it tight. I like a pretty tight seams in between each piece. I’ve seen some that hardly have any space at all and it looks cool too! This is one of the biggest mistakes people make…not putting the art close enough and not using ENOUGH pieces of art.
Go high if you can! Our wall is a bit low in this room, but you can see in my Texas house that I was able to create more of a “shape” with the wall. I love tapering it off to the sides with smaller pieces and also having a peak.
Create layers and use unexpected pieces. I love to add shelves for more art or something fun like a jar of glitter! Here is a closer photo of the shelves I used in TX). Anything you can use that creates a 3-D effect (sticking out away from the wall) adds interest.
Repeat your color combos. It might look like I just threw anything I could find on the wall! But there is actually quite a bit of thought that goes into what I’m including and what gets left out. I lean toward green, blue, coral, and mustard…and that unifies all of the pieces. You want it to look “cohesively chaotic” to get that boho vibe. :)
Stay within the same “tones” with your art. You’ll notice that the living room has more muted tones and the basement is a bit more whimsical and light/bright.
Have fun and don’t get too serious about it all. You can always go back and change something out if you don’t like it!

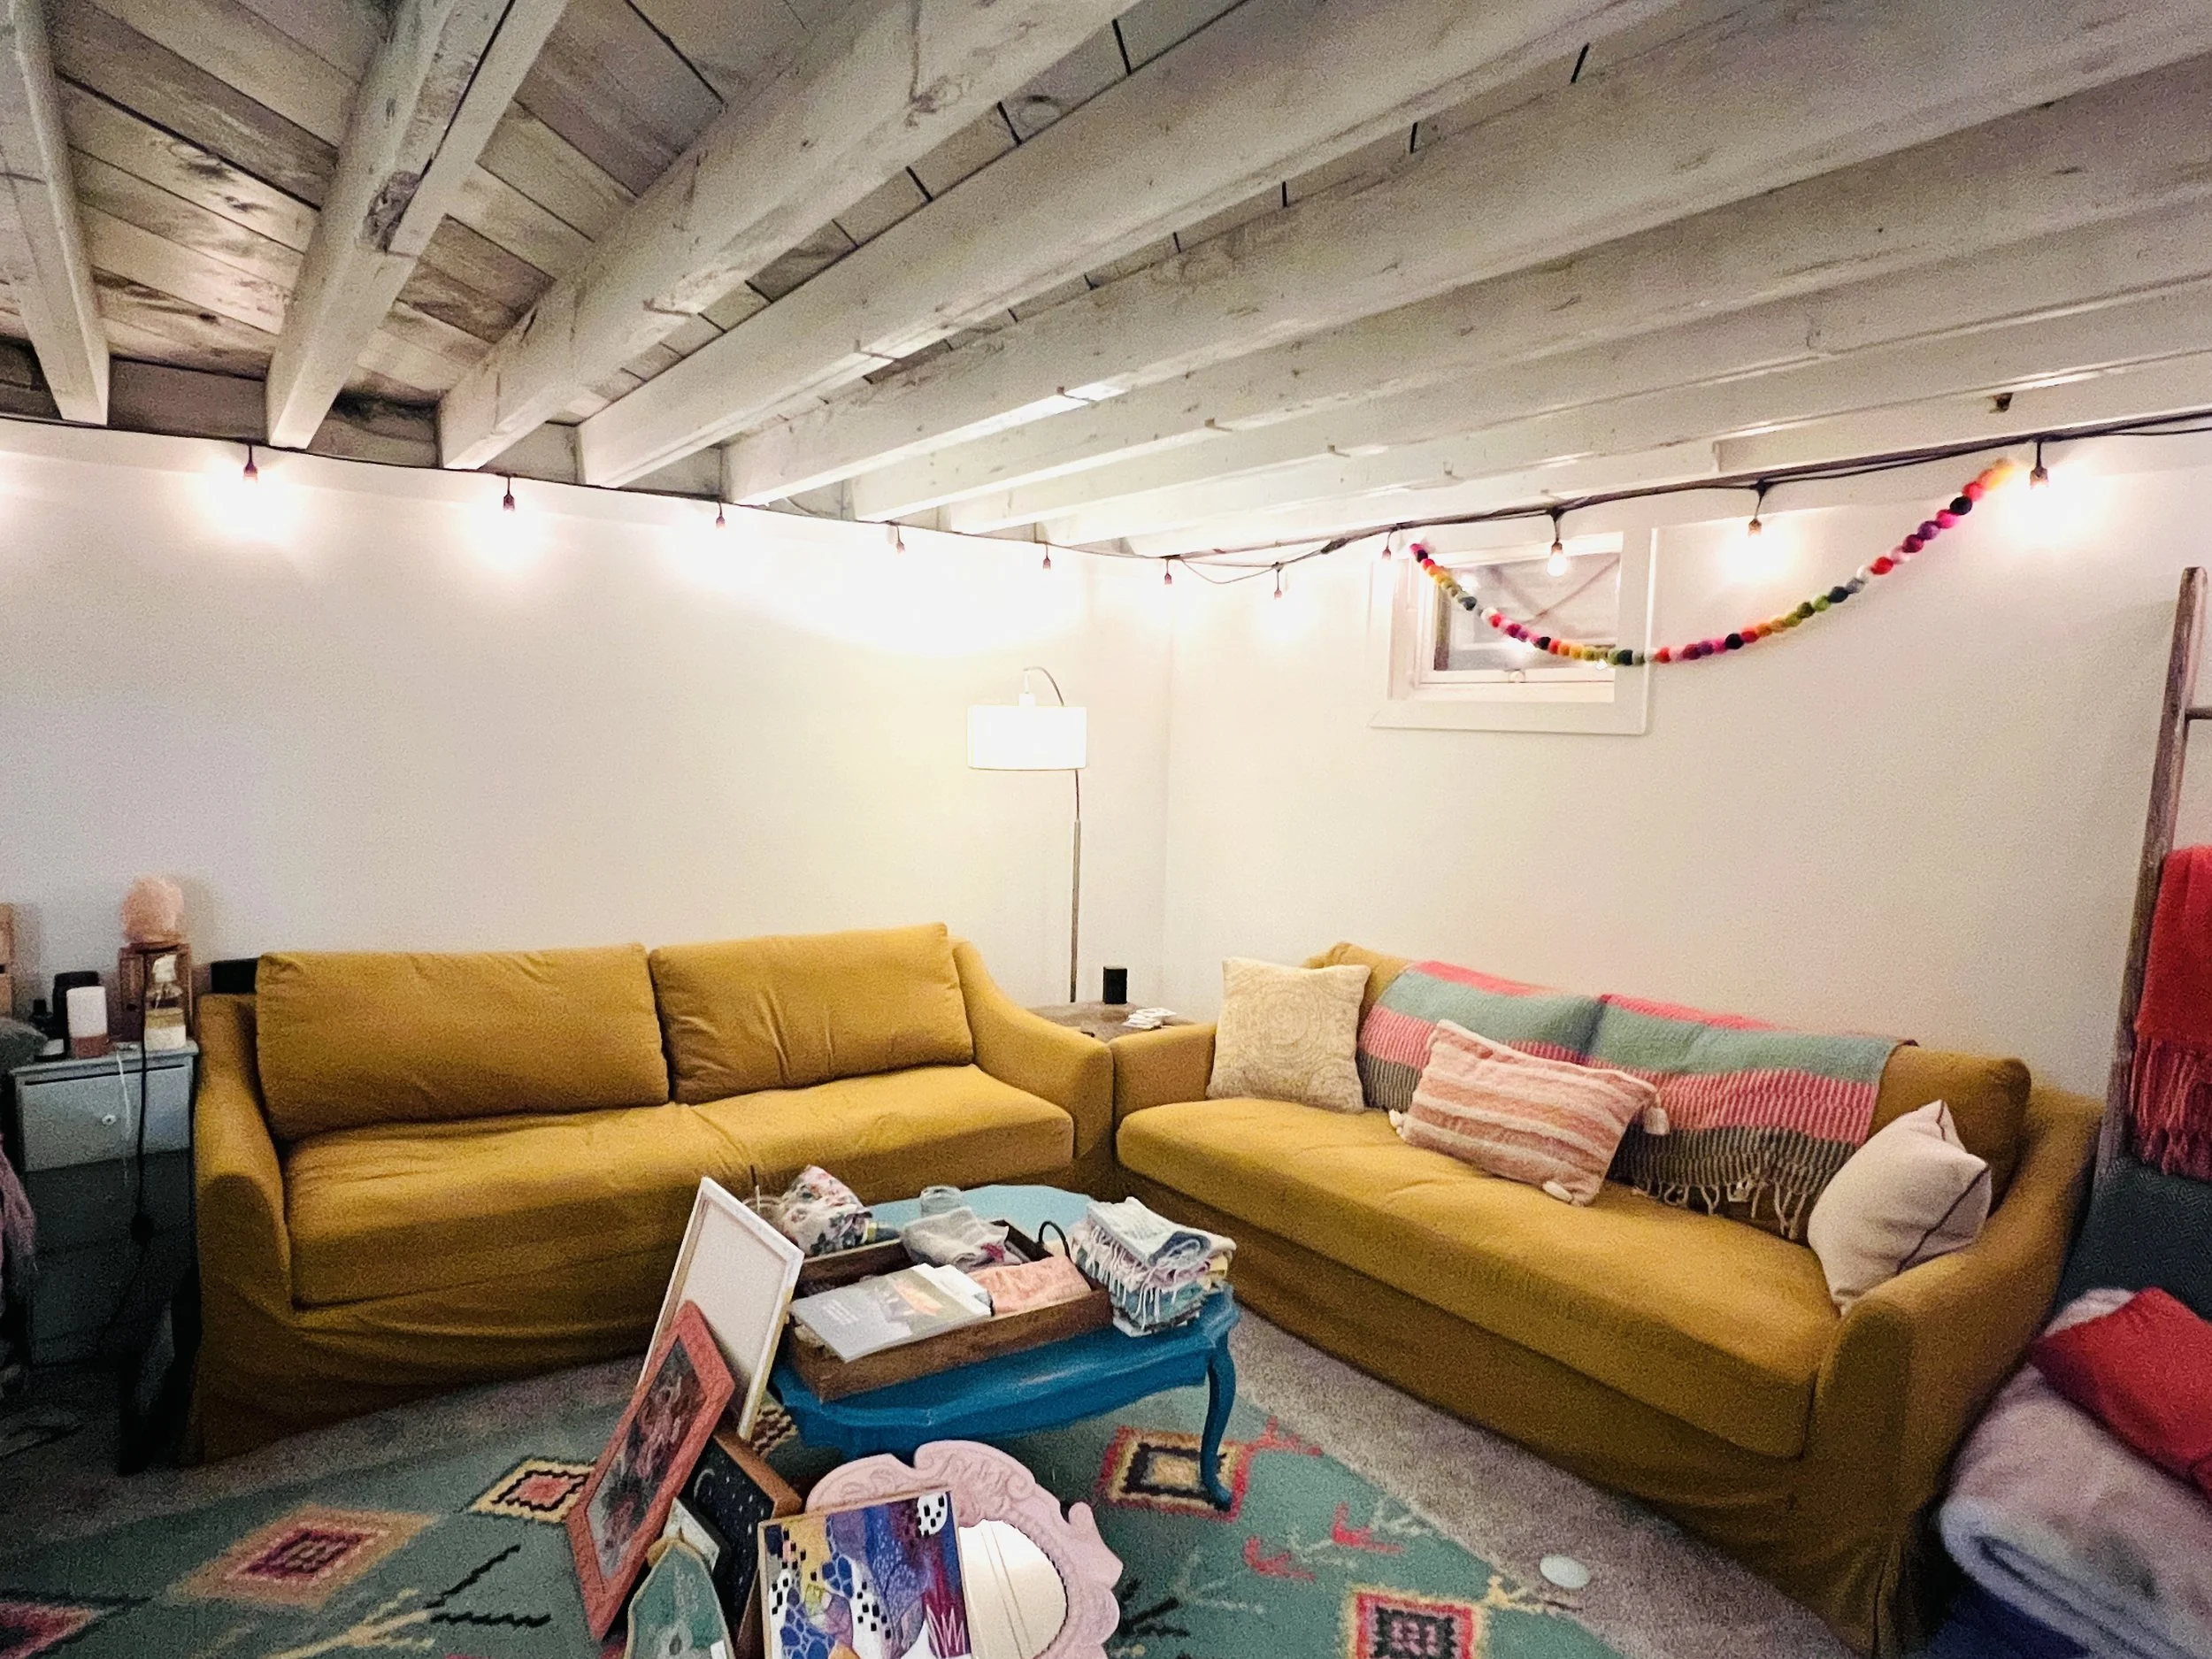
And because we completed the living room, we thought we better do the basement as well! This is where we “live” right now while we are remodeling. The purple coverlet in the bottom left corner below is our bed, and then there are 2 additional bedrooms for Lucy and Emma (Bella has her room upstairs). I have wanted to put up our gallery wall down here for SO long…but it just kept getting pushed back because other projects were more important.
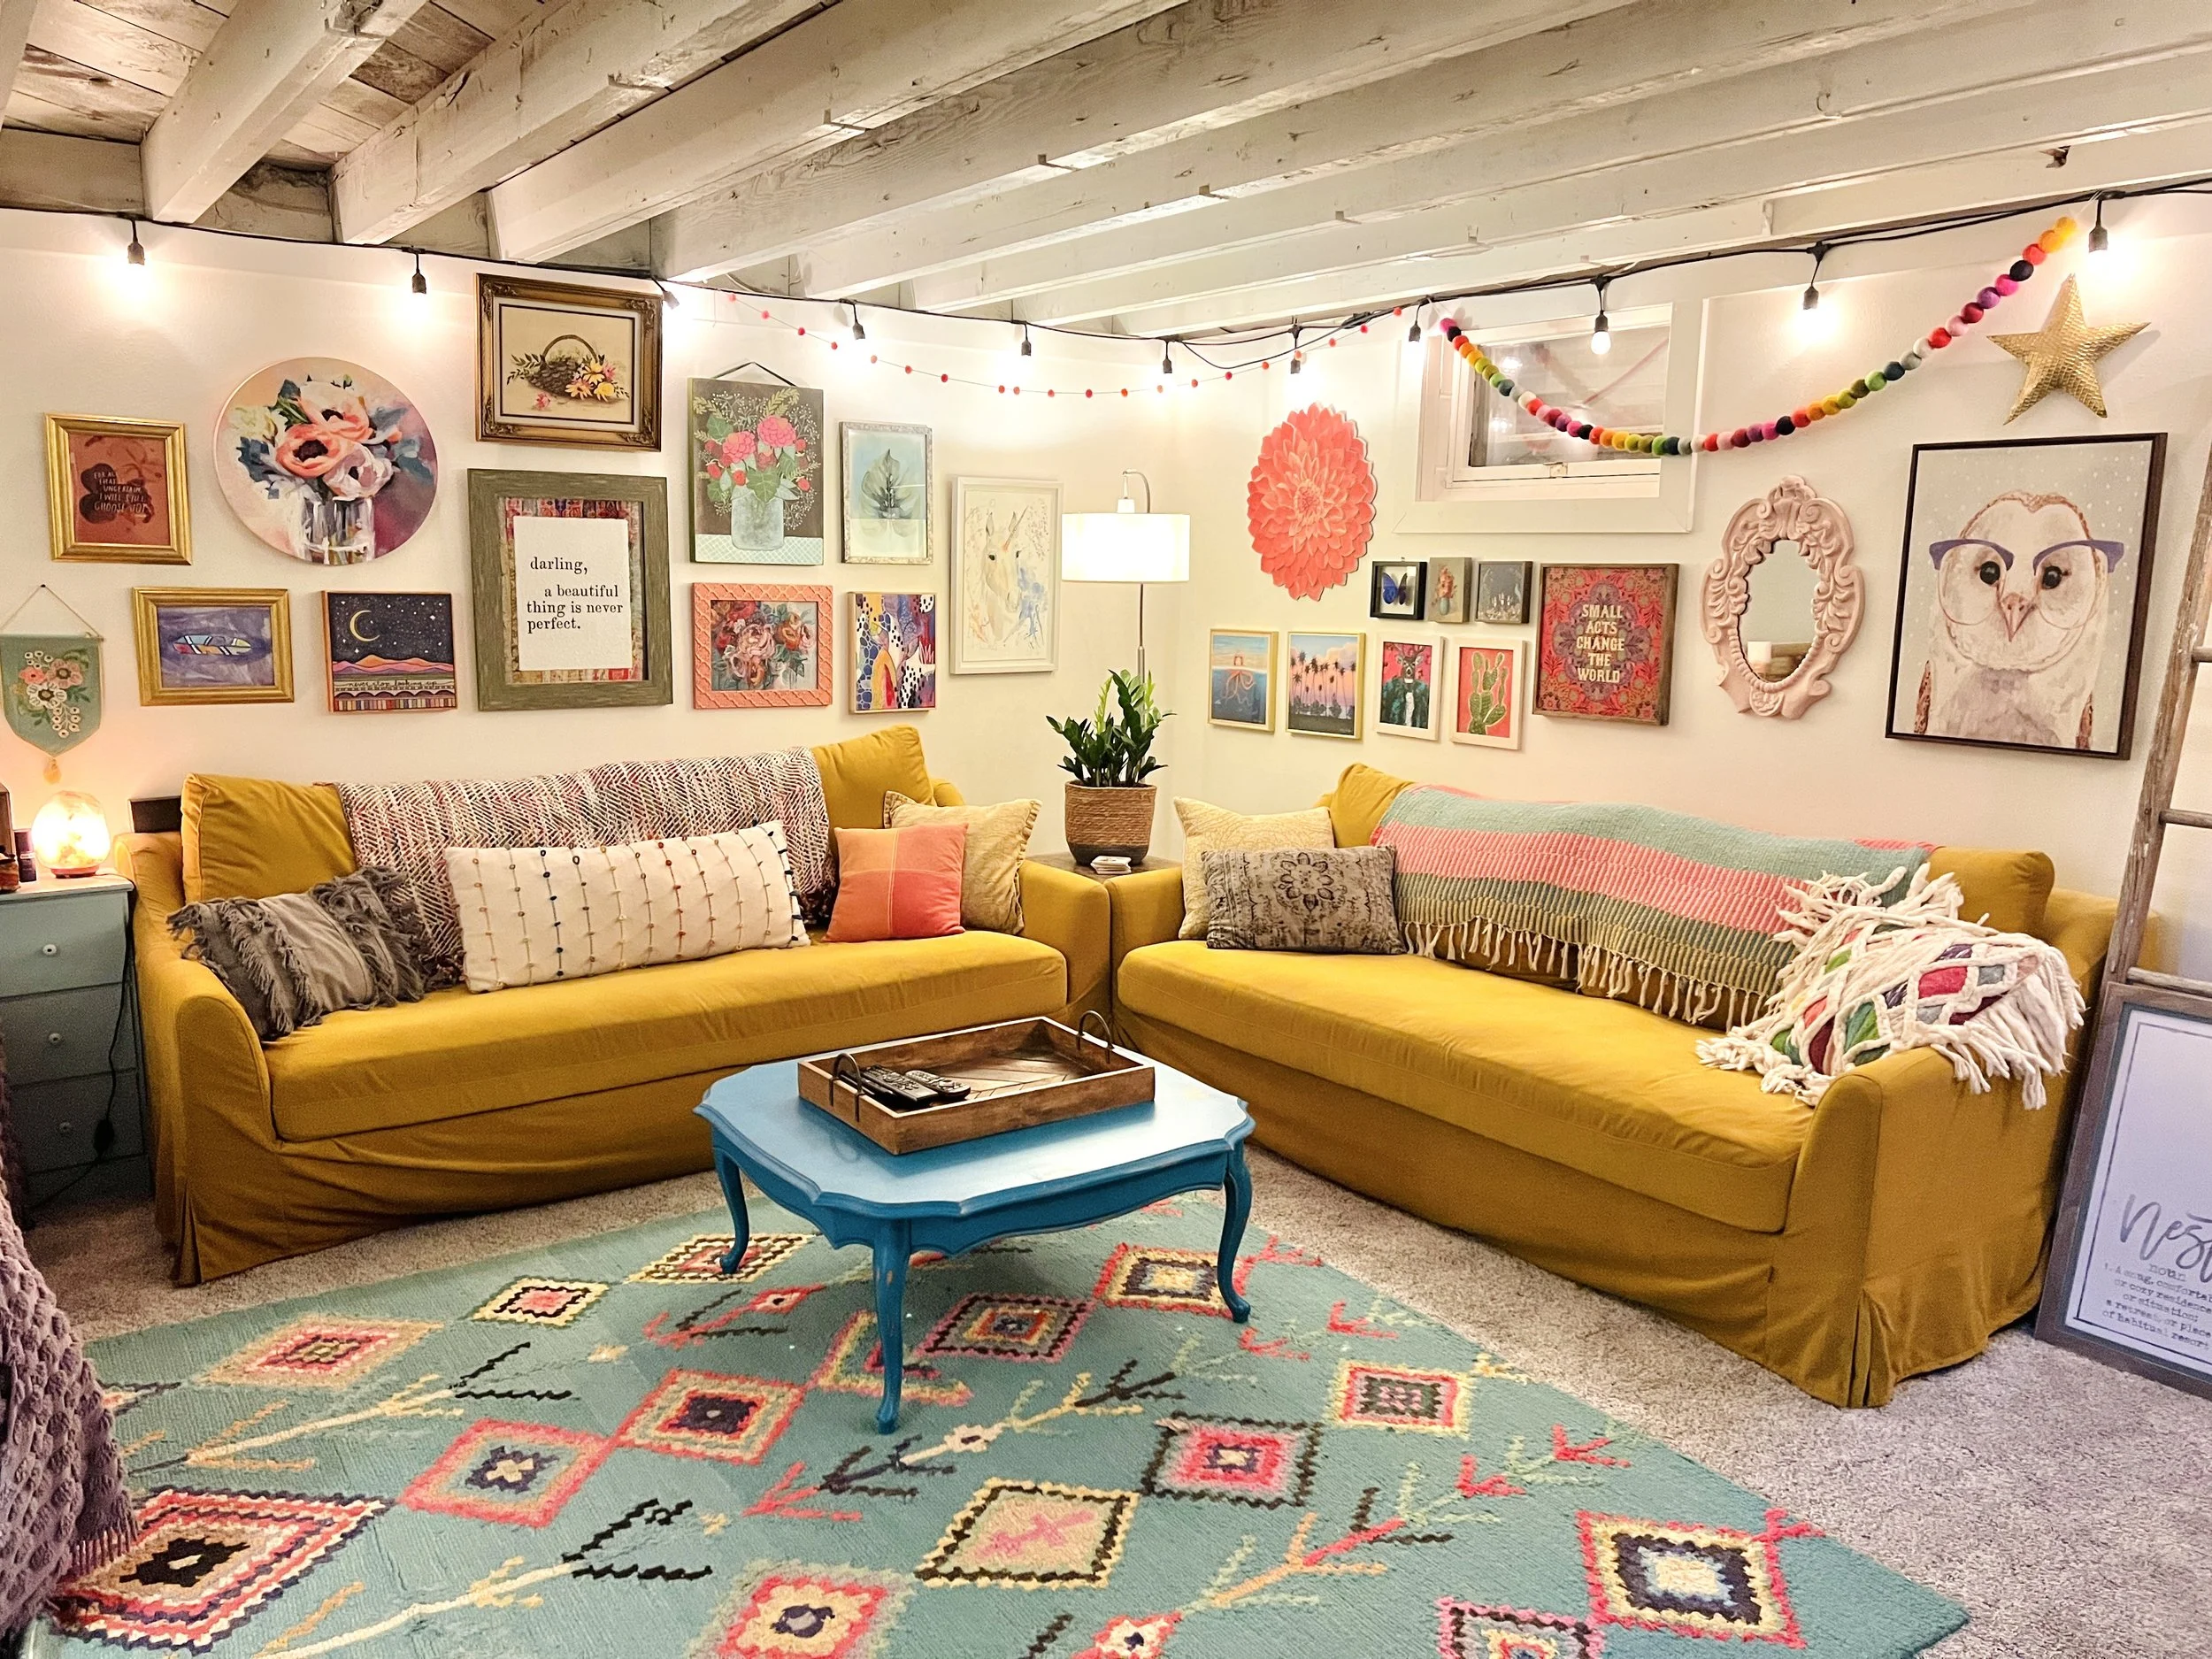
But look at it! Now I can’t believe we waited for so long…I get excited just to walk down the stairs now! These are IKEA Farlov couches with Soferia velvet slipcovers. The rug is the Berber Moroccan Diamond rug from RugsUSA.

Just remember friends…it’s not about perfection. Keep it quirky…it’s the best way!